User Manual
A step by step guide.
You can download a PDF
here
Since 2013, there have been around 165 school shootings in the United States. This estimates to roughly one school shooting a week. This is a terrifying realization that does not seem to be slowing down. In fact, school shootings seem to be on the up rise making them a realistic threat rather than a fictitious rarity. This is a huge problem for America that needs to be solved. SafetyApp allows students to reduce the amount of casualties in the event of a school shooting. Almost every student has a cell phone on them. Some kids start owning a cell phone as early as age 6. SafetyApp is an easy to use application that allows students to take safety into their own hands by reporting where school shootings are happening. By pinpointing the exact location of the shooter on campus, this allows other students to actively avoid that area and retreat to safety. SafetyApp will reduce the amount of casualties while also increasing the response time.
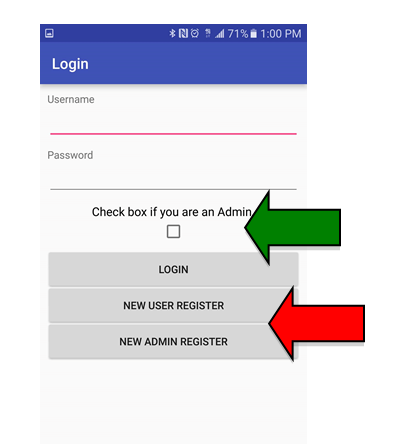
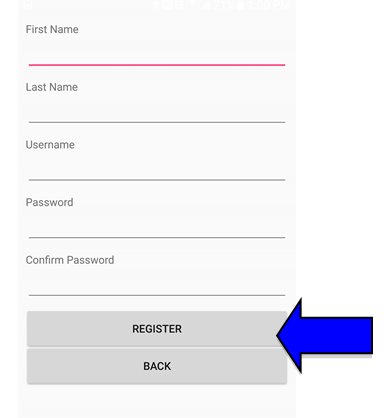
Registration:
User and Administrator
- Click New User Register
- Enter first name
- Enter last name
- Enter desired username (minimum 4 characters)
- Enter desired password (minimum 4 characters)
- Re-enter password (must match the password entered in Step 5
- Click the register button to finish
- *FOR ADMIN REGISTRATION ONLY*
- Repeat Steps 1 - 6
- Enter Admin Key
- Click the register button to finish

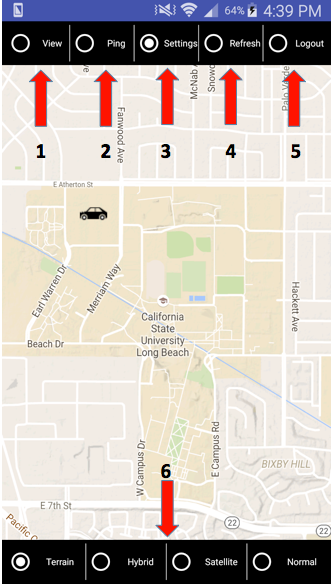
The User Interface
- View: Allows the user to click on pings and examine its details.
- Ping: Allows the user to pinpoint a location and give details about the incident.
- Refresh: Allows the user to retrieve the most recent pings.
- Settings: Allows the user to store emergency contacts.
- Logout: Allows the user to sign out from the application.
- Map Options: Different views for the map.
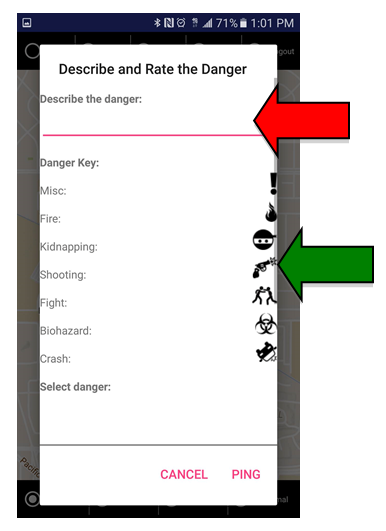
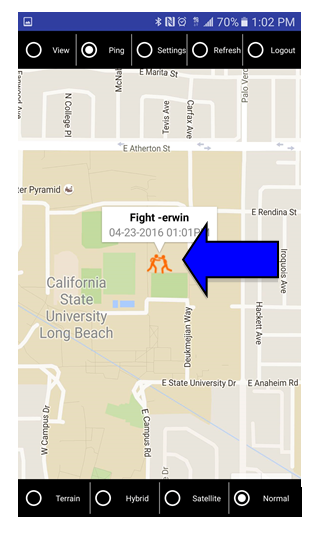
Ping Dangerous Locations
- Click the Ping button on the top left hand corner
- Click on the part of the map that has the dangerous location
- A pop-up dialog box will open up
- Describe the danger (shown with a Red Arrow)
- Pick the danger from the danger key (shown with a Green Arrow)
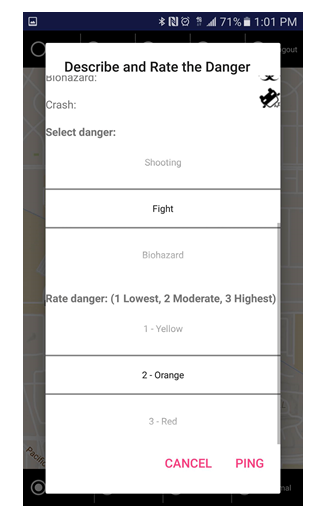
- Rate the danger from 1 through 3, 1 being the lowest and 3 being the highest danger
- The ping will show up on the map after pinging (shown with a Blue Arrow)
- NOTE: Icon colors change based on danger level.
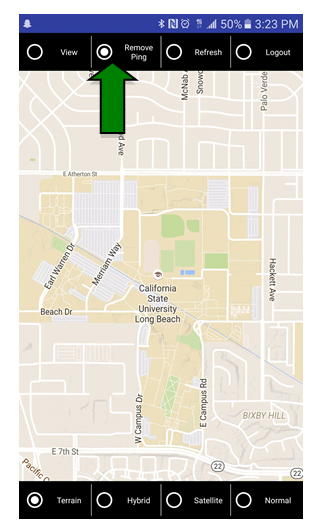
Remove Ping
For Admins only.
- *IMPORTANT* Must be logged onto Admin account
- Click the radio button labeled "remove ping" (shown with a Green Arrow)
- Select a pinged location
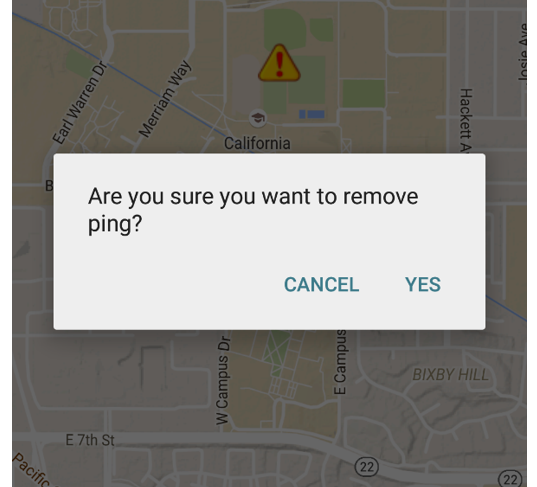
- A pop-up window, will ask you to confirm selection. Click Yes.
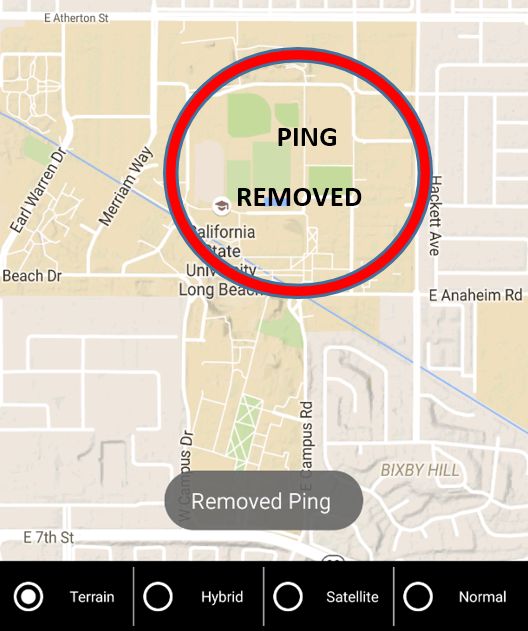
- A confirmation message will show at the bottom screen.
- Note: The reason for this to be an admin level feature is because the authorities must verify if the dangerous situation has been resolved
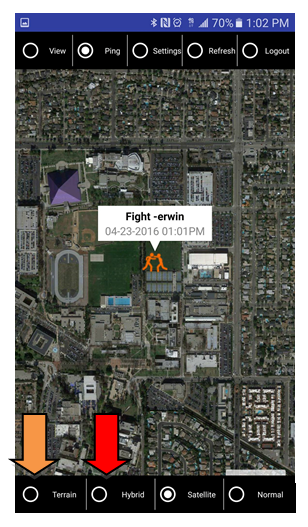
Notable features:
- Click on the 1st button on the bottom left to access Terrain Mode which is the primary map (shown with an Orange Arrow)
- Click on the 2nd button on the bottom left to access Hybrid Mode which is the secondary map (show with a Red Arrow)
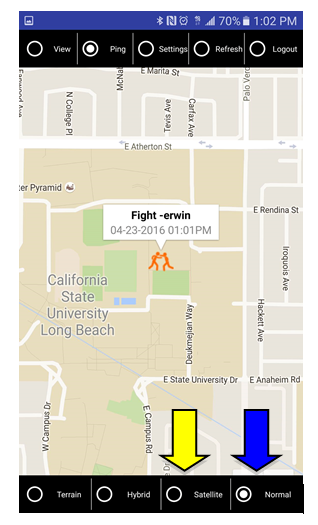
- Click on the 3rd button on the bottom left to access Satellite Mode which is the tertiary map (shown with a Yellow Arrow)
- Click on the 4th button on the bottom right to access Normal Mode which is the quaternary map (Image 4c Blue Arrow)